Alternative App Icons on iOS
I really learned about alternative icons for iOS apps, when Charlie Chapman started his podcast series and caused a bunch of indie app developers to create an image in this wonderful draft-style. Inspired by this idea, I started to sketch my own version for Baby’s Vision and started to implement custom app icons in my own app. It’s not a straight forward process to add these icons, Apple’s documentation isn’t particularly helpful either, but I got it working. Fast forward to last week, when my friend Oli reached out asking for advice with an issue he was debugging and he found me in the Slack group because I mentioned app icons and I learned that there’s a much easier way to handle those icons using the new asset catalog’s features. Well, this is a post explaining both attempts.
The old fashioned, multi-size approach
For this approach, we don’t use the asset catalog and rather add images directly to our project. It’s important to have them in the correct hierarchy and keep a consistent naming schema. We also have to add a bunch of PLIST entries to our project configration, matching each icon to phone and iPad entires.
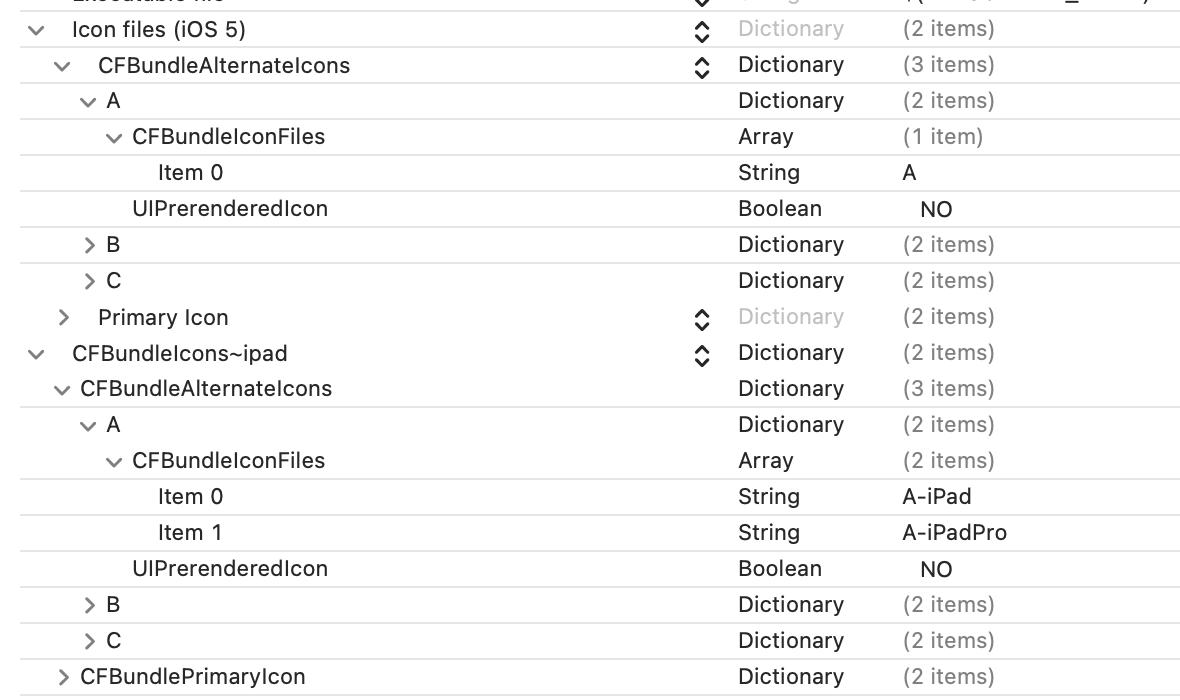

With this all set up, we can iterate over our config file and pull out the images we need to display them:
Bundle.main.object(forInfoDictionaryKey: "CFBundleIcons")
The sample project contains some sample code, which is just a very basic implementation of this feature and has lots of room for improvements. I also don’t bother to display the correct resolution and hard-code it to @2x for our previews.
The new approach, so much easier
Since Xcode 13 it’s possible to use single-size assets (a 1024px image for each icon) and let Apple figure out the rest, in terms of which image asset it needs to create for the specific device. We also don’t need to keep PLIST entries for each icon around, but we have to modify one setting in the build settings to make it all work. But this approach is a lot more maintainable and less error-prone.
First off, open your asset catalog and add as many icons you would like, but make sure to add them as type “New iOS App Icon” (under iOS in the menu).
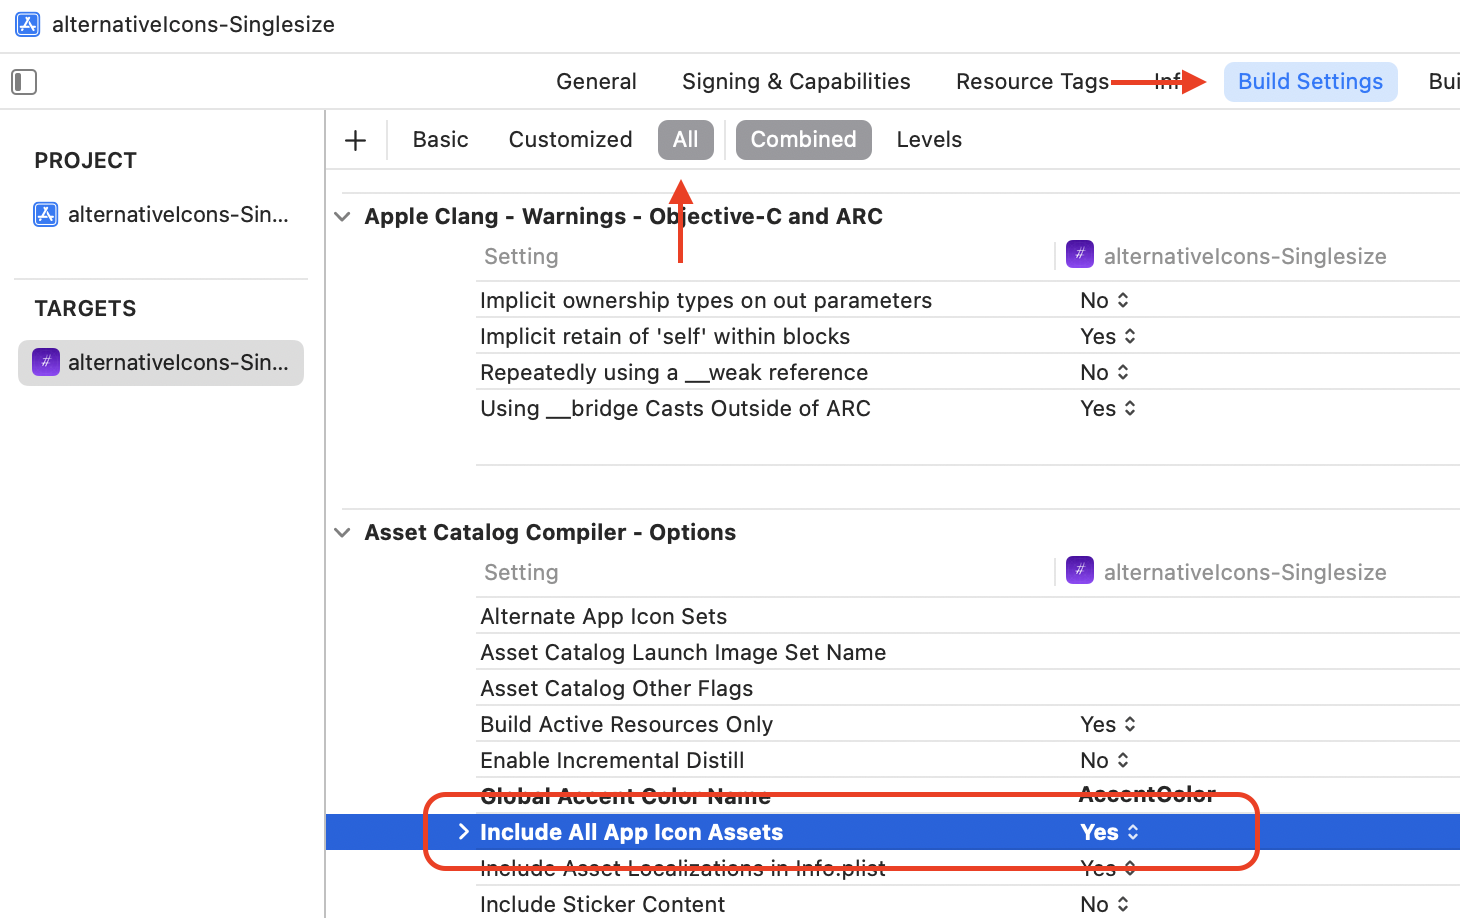
Then open your project settings and go to the Build Settings tab. Make sure you display all entries, not just Basic.
Now look for Include All App Icon Assets under Asset Catalog Compiler - Options and set that to Yes.
That’s really most of the work alrealy.
You can now display the assets using
UIImage(named: "AppIconAssetName")
and set the new app icon using
UIApplication.shared.setAlternateIconName("AppIconAssetName").
Note, for SwiftUI, it’s best to utilize Image(uiImage: YourUIImage), because for some reason, I haven’t been able to access the AppIcons directly using Image.
In the sample project, I’m using a simple enum to have list of icons.
Links
Along with this post, I published to repositories on GitHub: